

Table of Contents
Overview
The Interventions page can be accessed from the menu by clicking on Student Data | Interventions | Interventions.
The Interventions page displays eleven tabs on the left side of the page when a student has an Intervention record; Intervention Details, Stakeholders, Goals, Progress Comments, Meetings, Prior Interventions, Reasons & Concerns, Student Strengths, Additional Resources, Practices, and Documents.
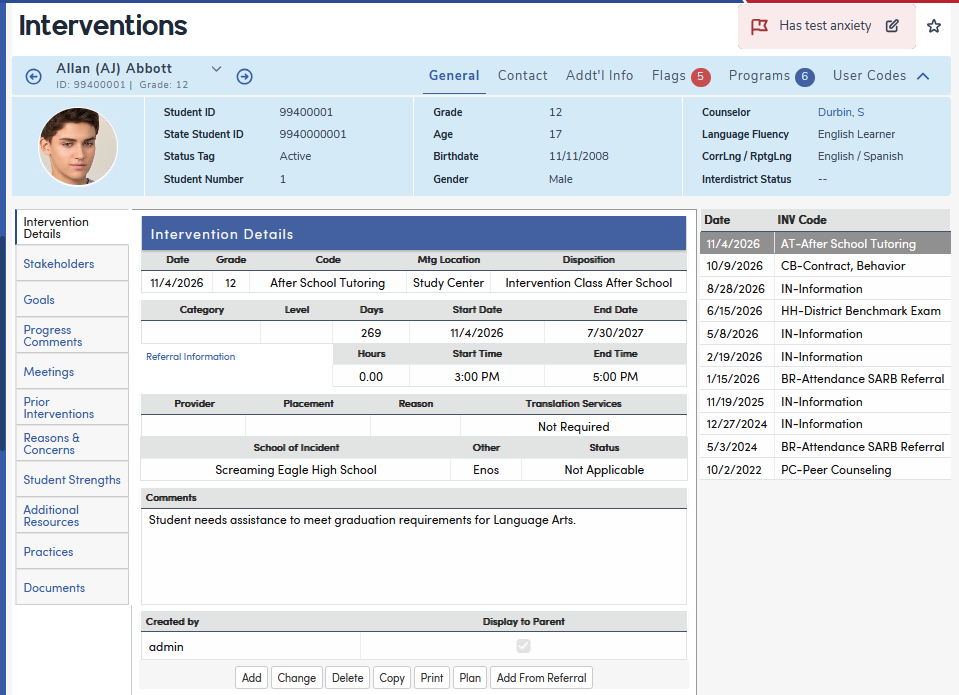
NOTE: All eleven tabs display even when the student does not have an Intervention record yet. Add an Intervention record first; the other tabs hold information for the selected Intervention record.
Security
Table | Permission | Description |
|---|---|---|
| Interventions (INV) | Read Insert Update Delete | View page Add new record Update records Delete Records |
Configurations
To add a new Intervention record for a student who has no Intervention records, click the Add New Record button on the Intervention Details tab. If the student already has records, click Add at the bottom of the tab. To edit the selected record, click Change, make your changes, then click Save or Cancel.
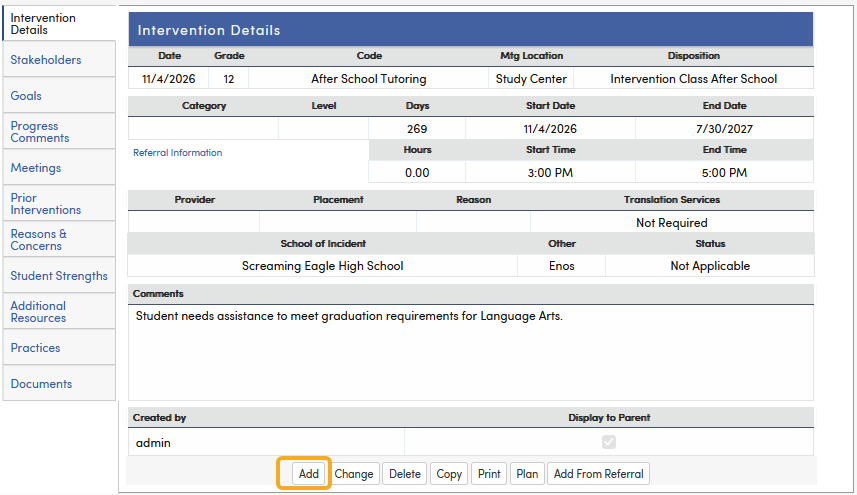
If a Referral for Intervention was completed for a student and that Referral for Intervention was Approved, the Interventions page will show an Add From Referral button (for users with Read permission to Referrals To Intervention (RFI) and Insert permission to Interventions).
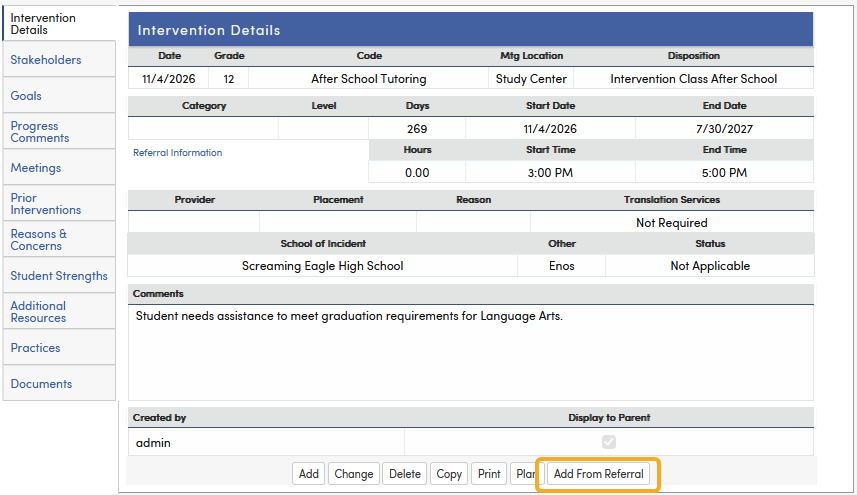
Clicking on the Add From Referral button will display a Currently Approved Referrals page. Click on the Approved Referral to create an Intervention record for it. Then click on the OK button.

The Intervention Details will then display to add information. The Intervention record is created and saved as soon as you click OK, dated today with the student's current grade. It copies the referral's Comment, Translation Services and language, and referring staff member (Referred By), and the referral's Reasons & Concerns, Prior Interventions and Student Strengths are copied to the matching tabs.
The Date field will default with today’s date. The Grade field will default to the student’s current grade level that is populated in the STU.GR field.
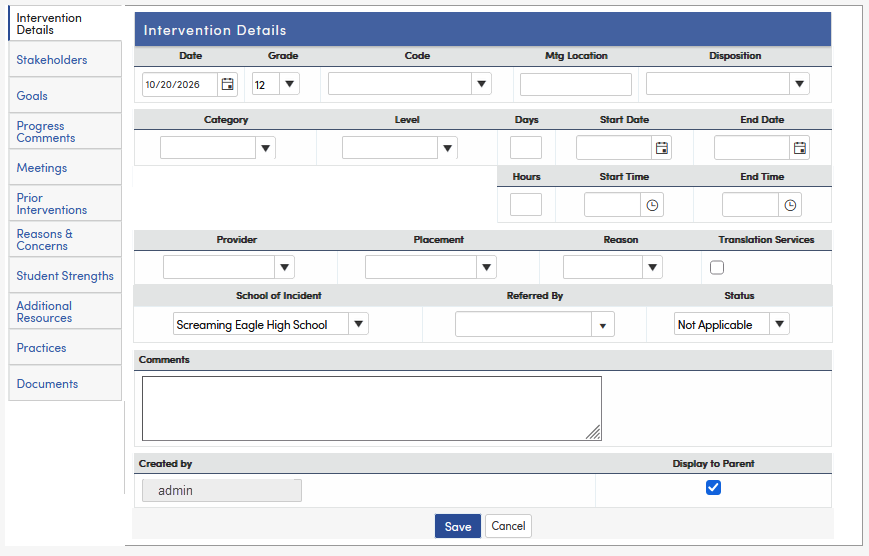
Enter the Intervention Details information and then click the Save button to save the information.
Code – Select an Intervention code from the dropdown list
Mtg Location – Enter the location where the meeting is being held
Disposition – Select an Intervention Disposition from the dropdown list
Category – Select a Category from the dropdown list
Level – Select a level for the Intervention
Days – Total number of days for the Intervention record. This value can be manually entered or will be calculated by the dates entered in the Start Date and End Date fields (the number of calendar days between the two dates).
Start Date and End Date – The Days will be calculated based on the start and end date values entered
Hours – Enter the total hours related to the Intervention record.
Start Time and End Time – Enter a Start and End Time for the Intervention.
Provider – Select a Provider for the Intervention from the dropdown list
Placement - Select a placement for the Intervention
Reason - Select an Intervention Reason
Translation Services – Check if translation services will be used, then select the language from the drop down list that displays (Home Language codes).
School of Incident – Choose a school to indicate where the Intervention took place. In California, the schools in the list come from the LOC table. In Texas, use the school search, which looks up campuses in the Course History Institutions (CHI) table. The field defaults to the student's school.
Referred By – Select who referred the student. The values from the dropdown list comes from the STF table and populates the INV.SRF field with the Staff ID. However, this field also allows for free-text entry. If a name is entered that is not in the dropdown list, when the record is saved it will populate the INV.RF field. If the Referred by is later changed to a Staff selection from the list, the name in INV.RF will be deleted and the INV.SRF field will be populated with the Staff ID. When a free-text name is used, the field label displays Other instead of Referred by. To make the Referred by field a required field, check the Staff Referrer SRF field on the Define Required Fields page.
Status – Select a status for the Intervention record
Comments - Enter any applicable comments regarding the student Intervention.
Display to Parent – This option can be turned on or off for each individual Intervention record.
NOTE: The Display to Parent option defaults to ON for all new Intervention records.
If the Display To Parent option is selected for an Intervention record and the Parent Portal Group is given appropriate security permissions to Interventions, the parent will then see that Intervention record and corresponding information in the Parent Portal Interventions area. The parent will not be able to see the Created By name or the Display to Parent setting.
The Display To Parent option is shown below.
If an Intervention record has the Display To Parent option deselected, that Intervention record information will not display to the Parent Portal.
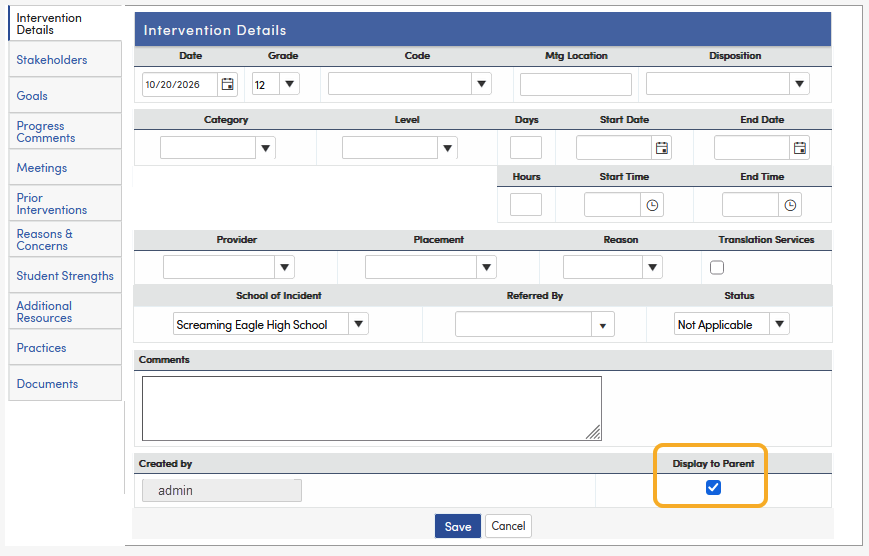
After all information has been entered, click the Save button to save the information. The read-only Created by field fills in automatically with the login name of the current user. In Texas, a Truancy Complaint Filed (Yes/No) field displays next to it.

When an Intervention record is created from a Referral, the Intervention record will also display a Referral Information link. Clicking on this link will bring the user to the Referral for Intervention record that was previously entered for the student.

A list of the student’s saved Intervention records will display on the right side of the Interventions page with the date and INV Code associated with the record. The most recent record displays at the top of the list and is selected automatically. To select a specific record to view or edit, click the appropriate record from the list.

A Red Flag and comment can be added to the Intervention record. To add a red flag, click the flag icon at the top right of the page. See Red Flags.

The buttons at the bottom of the Intervention Details tab also include:
- Copy – copies the selected Intervention record to other students. Select the students, then choose which related records to copy (Stakeholders, Goals, Progress Comments, Meetings, Practices, Additional Resources, Prior Interventions, Reasons & Concerns, Student Strengths).
- Print – opens the Interventions by Student report.
- Plan – prints the Student Intervention Plan report for the selected record.
To delete an Intervention record and all information attached to that record, highlight the Intervention record in the list on the right side of the page and then click the Delete button.
NOTE: If an Intervention record is deleted from the Intervention Details tab, any data in the associated tables will also be deleted (Stakeholders, Goals and their Actions, Progress Comments, Meetings, Practices, Additional Resources, Prior Interventions, Reasons & Concerns and Student Strengths). A confirmation message displays before the record is deleted.