

An Admin user or users with Administer permissions to Custom Reports can create a pre-configured Item bank. Users with Update to Custom Reports can create their own custom reports by selecting from the pre-configured items.
The Custom Report Items will need to be added before creating a Custom Report.
To create Custom Report Items, go to School Info > Configurations > Custom Reports, or click Edit Custom Reports on the Custom Reports tab of View All Reports. The page can also be opened from View All Forms > Custom Reports.
The Custom Report Items page has a Copy button, so you can add one item and then copy it to make similar items. For example, create an item for Part 1 of a test (such as ELPAC), then use Copy to quickly add the other parts, changing the Name, Description and Test Part on each copy. See Copy Report Items.
Three drop-down menus are available: Custom Report Items, Custom Reports and Color Layouts. The Custom Report Items menu is only shown to users with Administer permission to Custom Reports. Click Custom Report Items and then click Add New Report Item.

Items can be added from student-related tables (such as Student Data), test scores (TST), test strands (CST), college entrance tests (CTS), Programs and Interventions.
Click Add New Report Item and the following page displays.

Below are the options available when the Type of Table-Field Value is selected.
- Name - The short name to display in the report column heading. Name is required and can be up to 20 characters.
- Description - Required. The description displays in the legend of the report when the Display Legends print option is used.
- Item Width - Controls the width of the column on the report including the header label. The Item Width defaults to .39 inches but can be changed for fields with larger data. If the total width of all items is wider than the page, all columns are reduced proportionally to fit.
Example: a field with an email address would need a width of 2.
- Type - The following report types are available:

Different options will display depending on the Type selected. For example, if the Type of TST Table Score is selected, options of Test ID and Test Part will display.
The various options will be detailed below.
- Table - A drop down list of tables available to add to a Custom report, including STU
- Field – A list of fields for the selected table will display. Select the field to add to a Custom Report
- Filter By – Limits which values print for this item. The options are Is Equal To, Is Not Equal To, Is Between, Is Greater Than and Is Less Than. Is Between shows a second box for the upper value. For Is Equal To and Is Not Equal To, you can enter more than one value, separated by commas.
Custom Report Items do not need to be created for Teachers, Subjects, Department Codes, Courses, Sections or Periods. When the custom report is generated these options will be available for selection to be included on the report.
Note: If the Filter By option is used, only data that meets the criteria will print on the reports. For example, if Table of STU – Student Data and the Field of LF – LangFlu is selected and the Filter By is set to Is Equal To and the code of R is entered, only students with STU.LF = R will have their STU.LF printed on the report. The Filter By option will not limit the students included on the report.
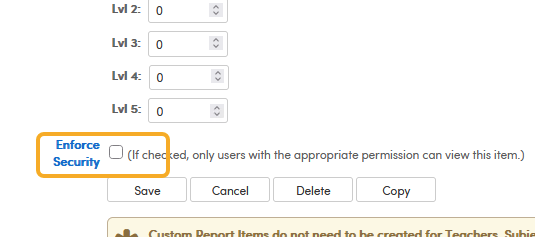
- Enforce Security (If checked, only users with the appropriate permission can view this item) – this option will prevent users from seeing data that is not granted under their permissions. The item is left off the report for users who don’t have Read permission to its table or field.
Below are the options for the test item types: TST Table Score, CST Table Score (strands) and CTS Table Score (college). Each has Test ID, Test Part, Date Option and Rubric Ranges. Test item types don’t have a Filter By option.
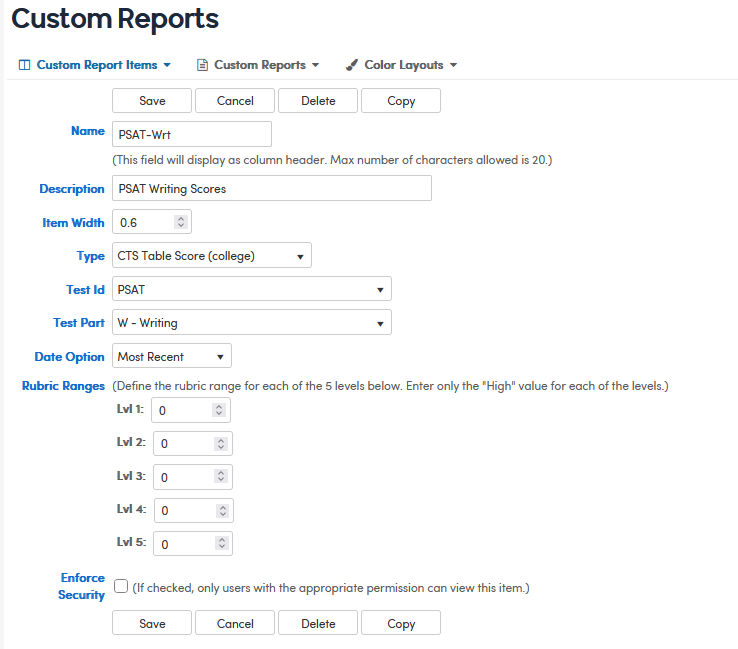
- Test ID – A drop-down of the tests. For TST, tests come from the Testing Control Table (CTL). For CST, they come from the Content Standard Names (CSN). For CTS, college tests come from the CTS code table (COD).
- Test Part
- TST – Table Score - A drop down list of parts in the Testing Control Table (CTL)
- CST – Table Score (strands) A drop down list of parts in the Content Standard Names (CSN)
- CTS – Table Score (college) - A drop-down list of the test’s parts from the COD table
- Score Field – Shown only for TST Table Score. Options are Raw Score, Scale Score, Percent, Performance Level, Other, Percentile, Grade Equiv, Curve Equiv, Stanine and Rubric.
- Date Option - Most Recent, Testing Year, Date Range or Testing Admin. Testing Admin is not available for CTS (college) items. Testing Year shows a year drop-down, Date Range shows From and To dates, and Testing Admin shows the administrations on file for that test. Colors from the Testing Number Possible (TNP) table are only used with Testing Year, Date Range or Testing Admin. With Most Recent, colors come only from the Rubric Ranges entered on the item.
- Rubric Ranges – Enter only the “High” value for each of the 5 levels. All five levels must be greater than 0 for the colors to be used. For TST items, colors apply when the Score Field is Scale Score or Performance Level. Rubric Ranges are used with Color Layouts.
Note: If the item’s Test ID, Test Part and administration match a record in the Testing Number Possible (TNP) table, and the Score Field is Scale Score, the colors display based on the TNP levels and the Rubric Ranges do not need to be entered for the item. The Custom Report can simply have a Color Layout associated to it. See Color Layouts for instructions.
Enforce Security (If checked, only users with the appropriate permission can view this item) – this option will prevent users from seeing data that is not granted under their permission
Below are the options when selecting the Type of Program. The report prints Yes when the student meets the condition.
- Type – Program
- Program – A drop down of programs in Aeries will display. Below are the conditions for the programs.
- Special Ed – The student has a Special Ed record (CSE) with an Entry Date (CSE.ED) on or before today, and no Exit Date (CSE.XD) or an Exit Date in the future.
- GATE – The student has a GATE record (GTE) with an Eligibility Start Date (GTE.ESD) or Participation Start Date (GTE.PSD) on or before today, and the matching end date (GTE.EED or GTE.PED) blank or in the future.
- English Learner – The student has a Language record (LAC) with a Start Date (LAC.SD) on or before today, and no End Date (LAC.ED) or an End Date in the future.
- Socio-Economically Disadvantaged – Parent Education Level (STU.PED) is “Not a High School Graduate”, or the student has a Free and Reduced record (FRE) with a code of F or R that started this school year (on or after July 1) and has not ended. Local codes translated to these CALPADS codes also count.
- 504 – The student has a 504 Plan record (FOF) with a Start Date (FOF.SD) on or before today, and no End Date (FOF.ED) or an End Date in the future.
- PGM Codes – The student has a Program record (PGM) with that code whose Eligibility or Participation Start Date (PGM.ESD or PGM.PSD) is on or before today, and whose matching end date (PGM.EED or PGM.PED) is blank or in the future.
- In Texas, the list also includes Residential Facility.
Note: If your district has data stored in two places for certain programs, like the Gate program (PGM.CD = 127 and Gate - GTE table), Custom Report Items will need to be created for each area. The same applies to 504 plans: the 504 program uses the 504 Plan table (FOF), while PGM code 101 uses the Programs table.
Below are the options when selecting the Type of Intervention.
- Intervention – A drop-down of the Intervention codes (INV code table), shown as “code | INV Code - description”. The report prints Yes when the student has a current intervention with that code.
Saving a Custom Report Item
Once all of the options have been selected for the new Custom Report Item, click the Save button.
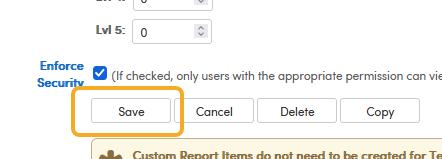
After you click Save, the message “Custom Report Item has been saved successfully.” appears, and the Delete and Copy buttons are displayed. If Name or Description is blank, the item isn’t saved and the message “Item Name is required.” or “Item Description is required.” appears.

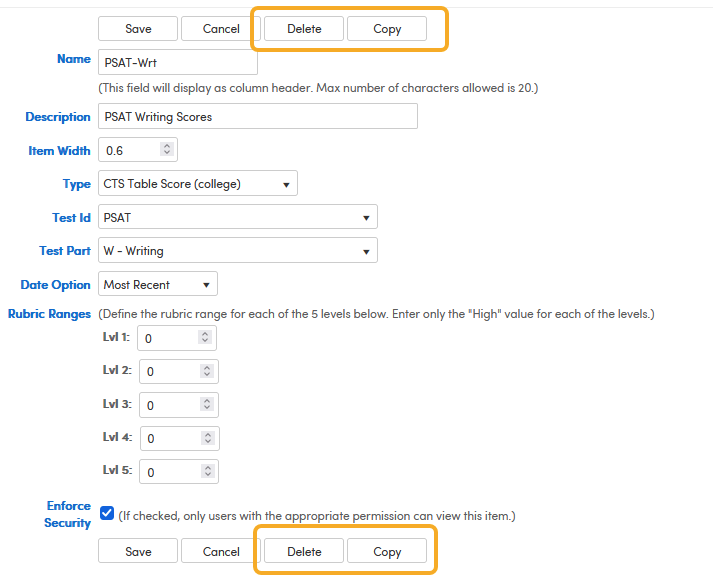
- Copy opens a new, unsaved item with all settings copied, including the Name. Change the Name before saving so the two items can be told apart.
- Delete asks you to confirm, then removes the item from every custom report that uses it.
Additionally, the newly created Custom Report Item can be found in the Custom Report Items dropdown. All Custom Report Items are in the dropdown, organized by their Type.