
Custom Report Items are created on School Info > Configurations > Custom Reports, from the Custom Report Items drop-down. Only users with Administer permission to Custom Reports see this drop-down, so only they can create or copy items. See Creating Custom Report Items.
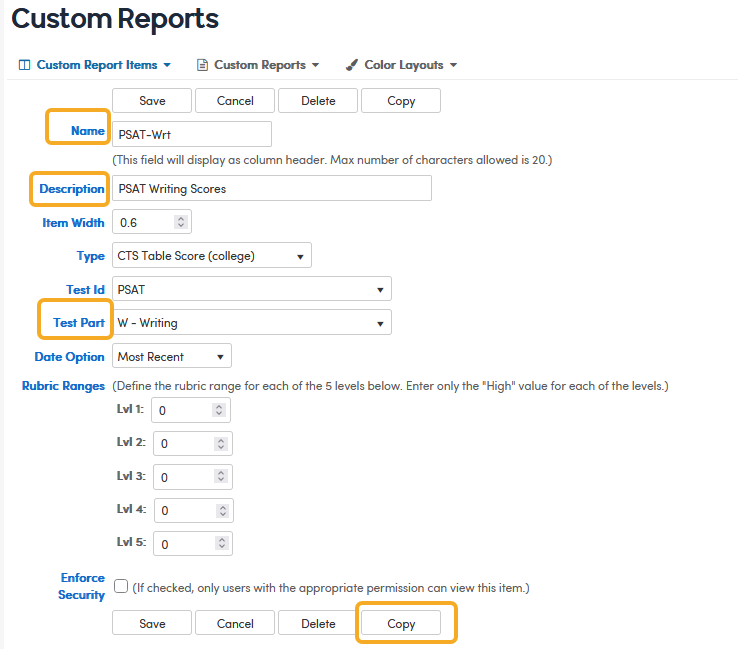
After a Custom Report Item is saved, the Delete and Copy buttons are displayed next to Save and Cancel. Click Copy to open a new report item that is pre-filled with all of the saved item’s settings, including the Name. The copy is not saved until you click Save; click Cancel to discard it.
For example, create a report item for Part 1 of a multi-part test (such as ELPAC), save it, and then click Copy to quickly add an item for each of the other parts. Change the Name, Description and Test Part to match the new part. The Name is used as the column header on the report (up to 20 characters), so give each copy its own name. Click Save when complete. The message “Custom Report Item has been saved successfully.” appears.