

The Communications Center page lets administrators manage the automated emails that Aeries Enroll Path sends to guardians throughout the enrollment process. This page is designed for district administrators who configure the messaging guardians receive at each step of enrollment.
From this page, you can:
- Customize the subject line and content of each automated status email
- Turn individual emails on or off without losing the saved content
- Add school-specific overrides so individual schools can send their own messaging
- Send a manual reminder to guardians with in-progress enrollment applications
- Preview an email with sample data before saving changes
- Insert dynamic variables that personalize each email with guardian, school, and enrollment information
To access this page, navigate to Communications in the left sidebar.
Table of Contents ↑
Prerequisites
Status Email Templates
Editing a Template
Turning Emails On and Off
School-Level Templates
In-Progress Reminder
Template Variables
Tips for Efficiency
Prerequisites ↑
To access and use the Communications Center page, you must have the following:
| Role | Access Level |
|---|---|
| Administrator | Full access to view, edit, enable, and send all automated emails for the district and its schools |
Status Email Templates ↑
Aeries Enroll Path sends automated emails to guardians at four key stages of the enrollment process. Each email uses a customizable template that you control from the Status Emails section of the Email Templates tab.
Note: During initial set-up, there will be no templates populated. Clicking the Add Email Template button will import all 4 template emails so you don't have to start from scratch.

Once the templates populated, administrators can completely customize them, and then toggle them on for use by the system.
The Four Status Emails
| Template | When It Is Sent |
|---|---|
| Submitted | Sent automatically when a guardian submits an enrollment application |
| Action Required | Sent automatically when staff push an enrollment back to the guardian for updates |
| Enrolled | Sent automatically when staff move an enrollment to the Enrolled status |
| In-Progress | Sent on demand from this page to guardians who have started but not yet submitted an enrollment |
Anatomy of an Email Card
Each template appears as a card showing:
- An icon indicating the email type
- The template name and the current subject line
- A toggle switch that turns the email on or off
- A pencil icon that opens the edit dialog
The In-Progress card includes two additional controls: a Send Now button for sending the reminder manually and an information icon that explains who the reminder will reach.

Editing a Template ↑
You can change the subject line and the message body of any status email. Updates take effect immediately for emails sent after the save.
Opening the Edit Dialog
To open the edit dialog for a template:
- On the Email Templates tab, locate the card for the template you want to change.
- Click the pencil icon on the right side of the card.
The Edit Template dialog opens with the template name in its heading.
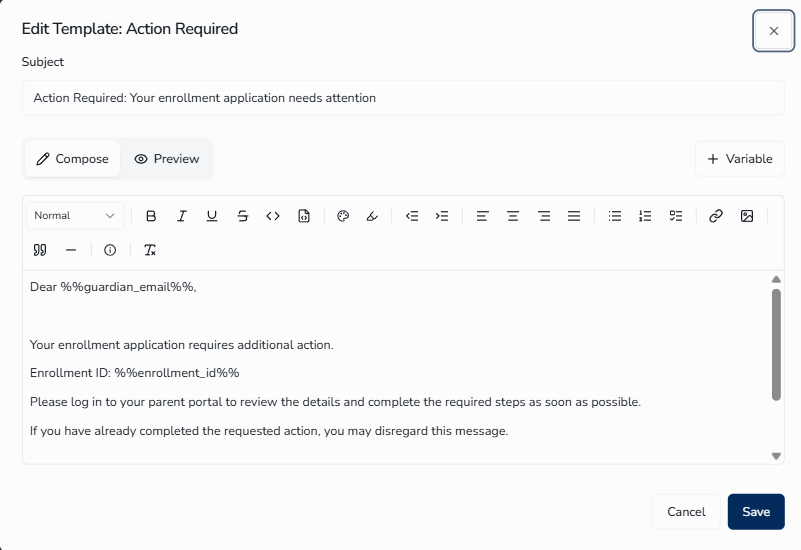
Editing the Subject and Body
To update a template:
- Update the Subject field at the top of the dialog. This is the subject line guardians see in their inbox.
- Make sure the Compose toggle is selected. This is the rich-text editor where you write the message body.
- Use the formatting toolbar to apply bold, italic, lists, links, images, and other styling as needed.
- Click Save to apply your changes.
To discard your changes, click Cancel or the X in the top-right corner of the dialog.
Template variables are placeholders that the system replaces with real information when the email is sent. For example, %%guardian_name%% becomes the guardian's actual name, and %%school_name%% becomes the school's name. Variables are covered in greater detail at the end of this document.
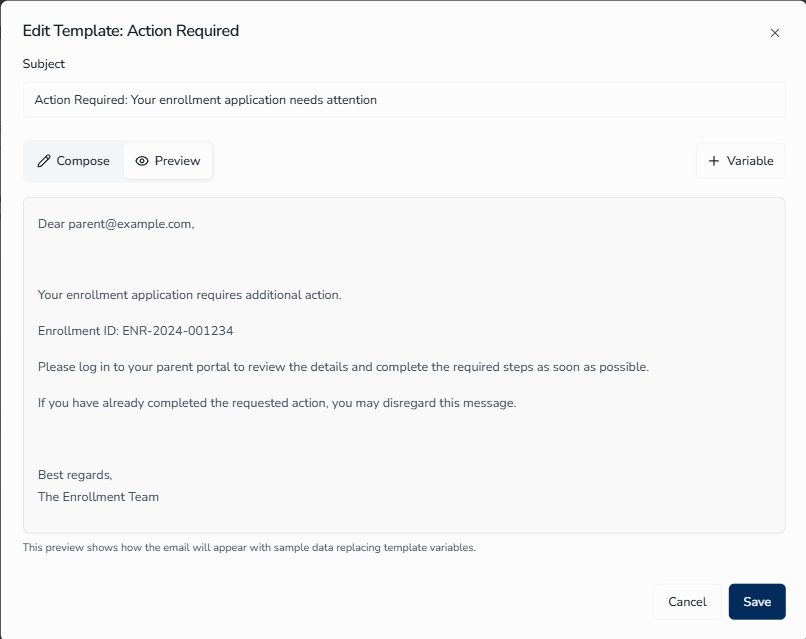
Previewing an Email
The preview shows you how the email will look with sample data substituted for the variables. This is a safe way to check formatting before you save.
To preview an email:
- In the Edit Template dialog, click the Preview toggle next to the Compose toggle.
- Review the rendered email. Variables are replaced with realistic sample values such as parent@example.com, ENR-2024-001234, and Lincoln Elementary School.
- Click the Compose toggle to return to the editor and continue making changes.
Turning Emails On and Off ↑
Each template has a toggle switch on its card. When a template is on, guardians receive that email at the appropriate moment. When a template is off, the system does not send that email.
To turn a template on or off:
- Locate the template card in the Status Emails section.
- Click the toggle switch at the right side of the card.
The change takes effect immediately. There is no confirmation dialog. Toggling a template off does not delete its content; you can turn the template back on later and the saved subject and body remain in place.
School-Level Templates ↑
By default, every school in the district uses the same set of district-level templates. When a school needs its own version of one or more emails, you can create school-level overrides for that school.
How District and School Templates Work Together
- Schools without custom templates automatically use the district templates.
- When a school has its own templates, the system uses the school version instead of the district version for that school.
- The school filter at the top of the Status Emails section controls which set of templates you are viewing and editing.
Viewing District Templates
To view the district-level templates that apply to every school:
- Open the school filter at the top-right of the Status Emails section.
- Select All Schools.
The cards refresh to show the district templates. Changes you make in this view apply to every school that does not have its own override.
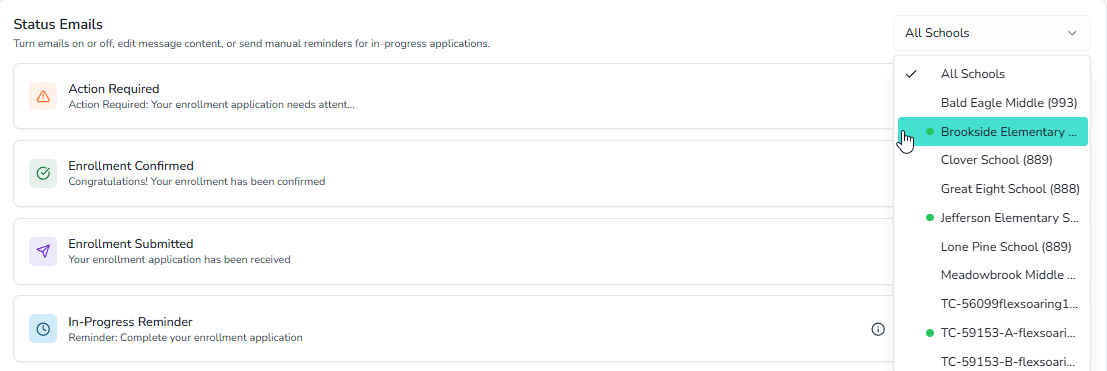
Viewing a Specific School's Templates
To view templates for one school:
- Open the school filter.
- Select the school by name. Schools that already have custom templates are marked with a small green dot next to the school name.
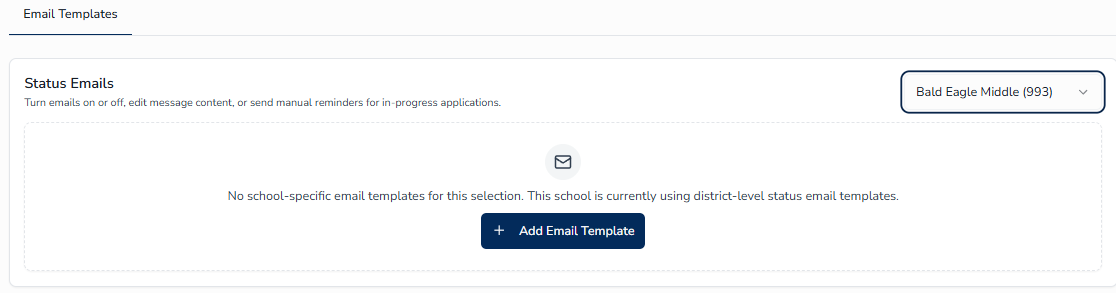
Adding Templates for a Specific School
When a school is selected but does not yet have custom templates, the Status Emails section shows an empty state with an option to create the templates for that school.
To add templates for the selected school:
- Confirm that the correct school is selected in the school filter.
- Click Add Email Template in the empty state.
The system creates all four status email templates for that school. The new templates start in the off state so that you can customize them before they begin sending.
Customizing School Templates
After you add the templates for a school, the four cards appear in the Status Emails section while that school is selected. Edit each template as needed using the same steps described in Editing a Template, then turn on the templates you want the school to use.
In-Progress Reminder ↑
The In-Progress Reminder is the only template you send manually. Use it to nudge guardians who have started an enrollment application but have not yet submitted it.
Editing the In-Progress Reminder
The reminder template works the same way as the status email templates. Open the card, click the pencil icon, and update the subject and body as needed. See Editing a Template for the full procedure.
Sending a Reminder Manually
To send the In-Progress Reminder:
- Decide whether you are sending the reminder for all schools in the district or for a single school.
- For the whole district, leave the school filter set to All Schools.
- For a single school, select that school in the school filter before continuing.
- Confirm that the In-Progress Reminder template is turned on. If it is off, turn it on first.
- On the In-Progress Reminder card, click Send Now.
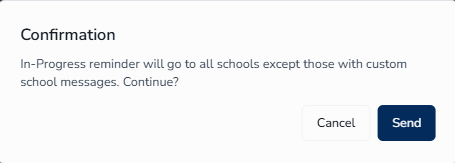
- Review the confirmation dialog and click Send.

Template Variables ↑
Template variables let you personalize emails with information about the guardian, the enrollment, the school, and the district. Each variable is enclosed in double percent signs, such as %%guardian_name%%. When the email is sent, the system replaces each variable with the corresponding real value.
Available Variables
| Variable | Replaced With |
|---|---|
%%enrollment_id%% | Unique enrollment identifier |
%%submission_date%% | Date the enrollment was submitted |
%%guardian_email%% | Email address of the guardian |
%%guardian_name%% | Full name of the guardian |
%%school_name%% | Name of the school |
%%school_contact_name%% | Principal or contact name at the school |
%%school_contact_email%% | Contact email for the school |
%%school_contact_phone%% | Contact phone for the school |
%%district_name%% | Name of the district |
%%district_contact_name%% | Superintendent or district contact name |
%%district_contact_email%% | Contact email for the district |
%%district_contact_phone%% | Contact phone for the district |
%%status%% | Current enrollment status |
Which Variables Apply to Each Template
Not every variable is available in every template. The Edit Template dialog's Variable popover only shows the variables that make sense for the template you are editing. For example, %%submission_date%% is available in the Submitted template but not in the Enrolled template, where the submission date is no longer the most relevant moment.
| Template | Variables Available |
|---|---|
| Submitted | Guardian name and email, enrollment ID, submission date, all school contact fields, all district contact fields |
| Action Required | Guardian name and email, enrollment ID, current status, all school contact fields, all district contact fields |
| Enrolled | Guardian name and email, enrollment ID, all school contact fields, all district contact fields |
| In-Progress | Guardian name and email, enrollment ID, all school contact fields, all district contact fields |
To insert a variable:
- Place your cursor in the editor where you want the variable to appear.
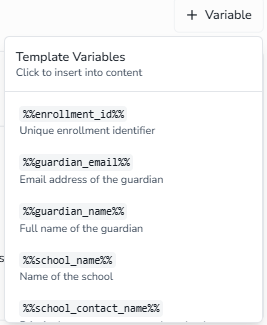
- Click the Variable button above the editor toolbar.
- In the popover, click any variable to insert it at your cursor.
The popover only shows the variables that are valid for the template you are editing. See Template Variables for the complete reference.
Tips for Efficiency ↑
- Preview Before You Save - Switch to the Preview toggle after every change to confirm the formatting and variable substitution look correct.
- Use the Variable Popover - Click the Variable button instead of typing variables by hand. The popover guarantees the correct spelling and shows only the variables that apply to the current template.
- Customize One School at a Time - If only a few schools need their own messaging, start with those. Schools without custom templates continue to use the district templates automatically.
- Turn Off Instead of Delete - Use the toggle to pause an email rather than rewriting it. The saved content stays intact and is ready when you turn the template back on.
- Send the Reminder Strategically - The In-Progress reminder is most effective near key enrollment deadlines. A well-timed reminder can recover applications that would otherwise stall.