

Generating a OneRoster API connection to integrate with a supported third-party product is easy! Follow these steps:
1. Login to your Aeries website as an admin
2. Navigate to Security, -> API Security
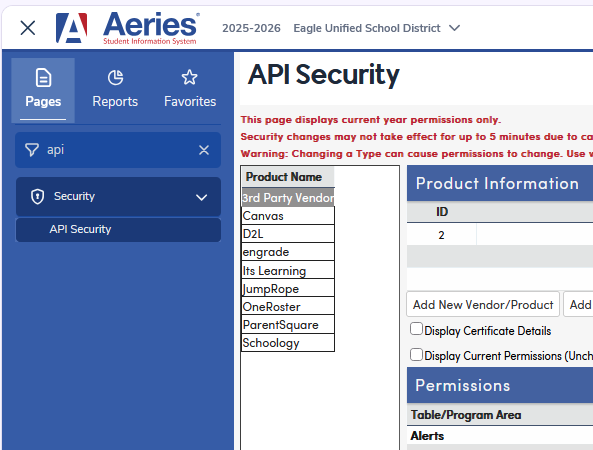
3. Select the “Add New Record” button. (If a vendor/product is already selected, the button reads “Add New Vendor/Product.”)
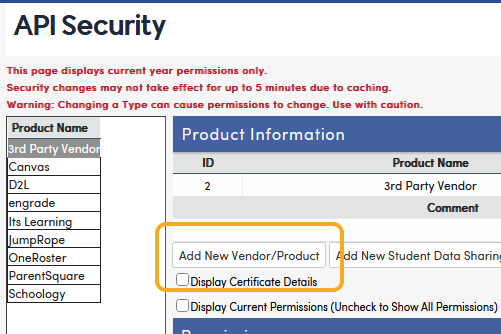
4. Enter the product name and any comment you’d like.
a. Select "OneRoster" from the Type drop-down menu.
b. Click Insert to Save the record.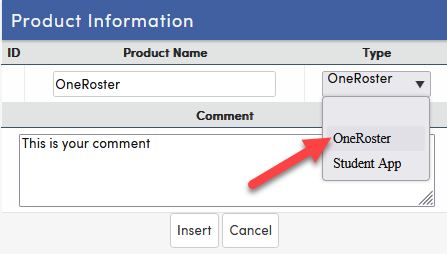
5. Select the checkbox next to “Display Consumer ID & Secret Keys for OneRoster"
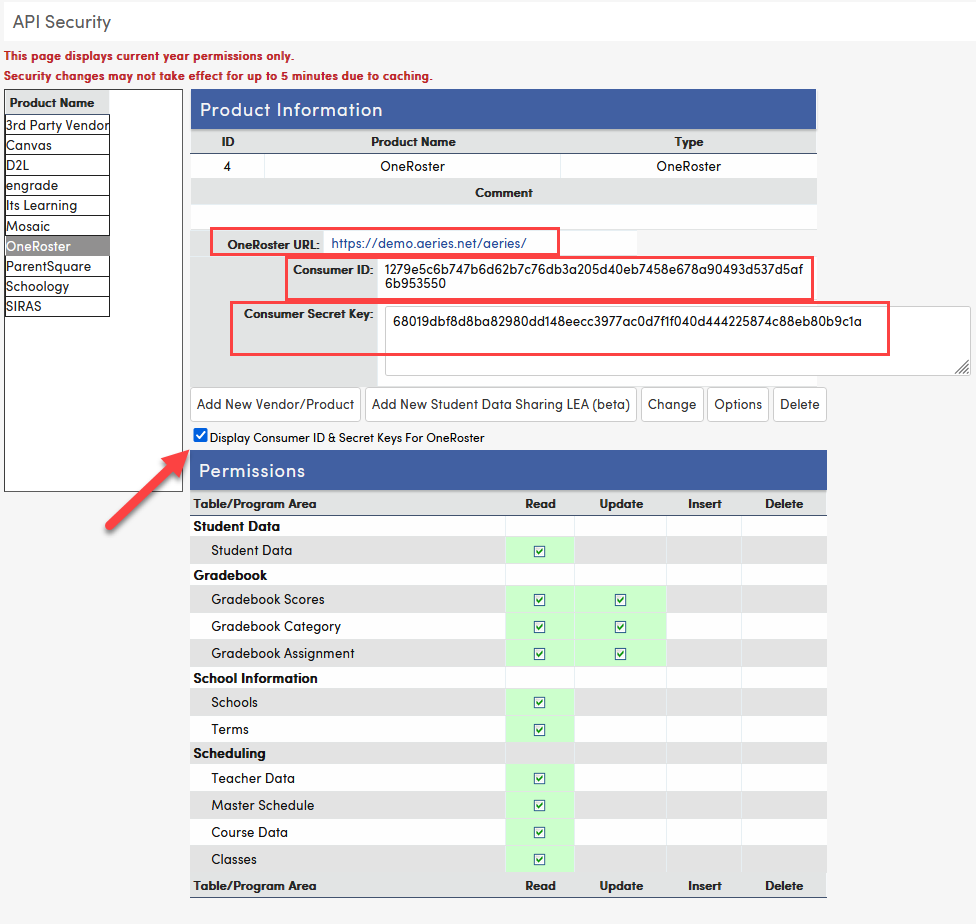
6. Add the applicable permissions provided by the OneRoster vendor.
You’ll provide the Consumer ID and Secret Keys along with your OneRoster URL to the vendor so that they can connect to the OneRoster API.
*The "OneRoster URL" is shown on the API Security page and on the School Options page at the district level. Copy it exactly as shown. In this example, the highlighted text is the "OneRoster URL." Your own OneRoster URL will be different.
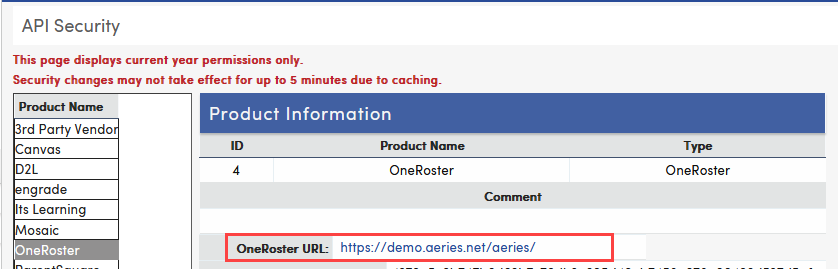
The OneRoster URL is your Aeries base URL plus the OneRoster path /ims/oneroster/v1p1. For hosted customers, the base URL ends in .aeries.net or .asp.aeries.net followed by the portal path, for example https://yourdistrictname.aeries.net/admin or https://yourdistrictname.asp.aeries.net/admin. Self-hosted districts use their own Aeries web address.